Sunday, November 24, 2013

I Love Turkey!

For those of you who don't look at email on the weekend you are going to have 2 blogs from me Monday morning! This is the first time I have power-blogged, but I want to let you know about this fantastic sounding turkey recipe in time for the holiday and time is running short. This recipe may be just what you are looking for if you want a slightly different twist on roasting your turkey. This also is the FIRST time I have blogged a recipe that I have not tried myself, but I am totally confident, since it is from Anne Burrell of Food Network fame, that it will be delicious. Since I have not made it myself, photos will be sparse, but I will add a couple photos from turkey's past!


BRINED HERB-CRUSTED TURKEY
WITH APPLE CIDER GRAVY
Brine:
7 quarts water
1 quart apple cider
3/4 cup Kosher salt
1/3 cup granulated sugar
1 large onion, diced
1 large carrot, diced
3 ribs celery, diced
1 head garlic, cut in 1/2 equatorially (don't you LOVE that word?!)
1/2 bunch rosemary
1/2 bunch fresh sage
6 bay leaves
1 (12 to 14 lb.) turkey

Herb crust:
1 bunch fresh rosemary, leaves finely chopped
1 bunch fresh sage, leaves finely chopped
3 sticks butter, room temp
Kosher salt

Gravy:
1 large onion, cut into 1/2 inch dice
1 large carrot, peeled and cut into 1/2 inch dice
2 ribs celery, cut into 1/2 inch dice
4 cloves garlic, smashed
2 Granny Smith apples, cut into 1/2 inch dice
5 bay leaves
1 cinnamon stick
1 bunch thyme
Kosher salt
1 quart chicken stock, divided
2 cups apple cider, divided
1/2 to 3/4 cup all-purpose flour (this is where you can use your cooked brown flour again)

Preparation:
To brine the turkey:  Combine all ingredients for the brine in a large container. I am using a large garbage bag set in the turkey roaster. Add the turkey and let it brine in the refrigerator for 2 to 3 days. Turn the bird every so often so all parts benefit from the brine.

To prepare the turkey for cooking:  Remove the turkey from the brine the night before roasting and pat it thoroughly dry with paper towels. This is different from what I have done when brining in the past. Generally, I would rinse the bird thoroughly, but this time will go with Anne's method. Combine the rosemary, sage, and butter for the herb crust in a small bowl. Season to taste with Kosher salt. Work the butter under the skin of the turkey and massage it into the breast and the legs. Massage the butter on the outside of the skin as well. Tie the legs together over the breast so they will protect it during cooking and help keep it moist and juicy.

Gravy prep:  Put the onions, carrots, celery, garlic, apples, bay leaves, cinnamon stick and thyme in a roasting pan and season with salt. Arrange the turkey on top of the veg and refrigerate overnight UNCOVERED. This will help the skin dry out and become really brown and crispy. Make sure that there is no raw food near the turkey in the refrigerator. After refrigerating overnight, the turkey is ready to go in the oven.


Preheat oven to 450 degrees.

Put 2 cups chicken stock and 1 cup apple cider in the bottom of the roasting pan. Roast the turkey in the preheated oven until the skin gets really nice and brown, about 40 minutes. Lower the oven temp to 350 degrees for the remainder of the cooking time. Baste the turkey every 30 minutes or so and add more stock to the roasting pan, if needed. Cook about 15 minutes per pound. Once it gets to the proper color, tent the turkey with aluminum foil to prevent it from getting too dark.

Remove the turkey from the oven when an instant read thermometer inserted in the thickest part of the turkey registers 160 degrees. Make sure that the thermometer is not touching a bone when doing the reading. When the turkey has reached the proper temp, remove it from the roasting pan to a cutting board and let it rest for at least 30 minutes. (I usually get impatient waiting, but this year am sticking to the 30 minute wait time!) Cover loosely with foil.

Strain all the veggies over a bowl to separate them from the stock/mixture. Discard the veg. Skim off the fat and add it to the roasting pan. This is the fat for the roux. Put the roasting pan over 2 burners and over a low heat whisk in the flour. Cook until the mixture looks like wet sand, about 4-5 minutes. Slowly whisk in the remaining cup apple cider, remaining chicken stock and the stock/cider mixture. Cook until the mixture has thickened and reached a gravy consistency. Taste and adjust the seasoning. Pour into a serving pitcher or bowl.

Carve the turkey, transfer to a serving platter and serve with the gravy.

ENJOY!

HAPPY THANKSGIVING
TO YOU AND YOUR FAMILY!

WISHING YOU A DAY FILLED WITH LOVE AND JOY!

I AM SO GRATEFUL FOR THE BOUNTY OF MY LIFE.

THANK YOU, ONCE AGAIN FOR ALLOWING ME TO SHARE MY PASSION FOR COOKING WITH YOU!


Saturday, November 23, 2013

Thanksgiving Tidings...

We just got back from the Thanksgiving Day Parade here in Plymouth. This is the second largest Thanksgiving parade in the country, after the Macy's Parade and this year it was truly spectacular! It has everything you want to see in a parade: marching bands, drum and bugle corps, horses of all kinds, old cars, floats, those big huge balloons that take several people to hold down and of course, Santa riding in to conclude the parade.
But before we get into Christmas I want to share my Thanksgiving Day menu and give you a couple "do-ahead" tips. I made two cranberry relishes last week; one is a repeat from last year--back by popular demand, Ginger Cranberry and the other is a fairly standard Cranberry Orange relish with the addition of pineapple. These sauces keep well for a week or more in the fridge making them a quick and easy do-ahead for your big dinner. And so much better than the stuff from the store.

You can find the Ginger recipe from my November 30, 2012 blog. The freshly grated ginger root gives the cranberry a nice kick. Here's the recipe for the new sauce:

CRANBERRY ORANGE PINEAPPLE SAUCE

The Ginger Cranberry is on the left and the Orange Pineapple on the right.
They look nearly identical, but taste very different!
Ingredients:
3 cups fresh cranberries (1 12 oz. bag)
1 cup sugar
1/2 cup freshly squeezed orange juice
Peel and cut the other half into small pieces; remove any white membrane
Zest from the whole orange
8 oz. can crushed or chunk pineapple in its own juices (not sweetened). I used crushed so the pineapple itself disappeared, but left a nice pineapple flavor.
1 cup water

Preparation:
Bring all ingredients to a boil over moderate heat stirring occasionally. Reduce heat and simmer, uncovered stirring occasionally until slightly thickened, about 20 minutes. Sauce will continue to thicken as it cools. Cool completely and then store in tightly covered glass container in the refrigerator.

Here is the complete Thanksgiving Day menu. You will find some of these recipes on last year's November 2012 blog.

Hors D'oeuvres will be handled by my brother Skip and his wife Esther, and his son Chris and wife Sarah who are also joining us at my Dad's this year with their adorable 2 year old baby, Peregrine.

*TURKEY ROULADE WITH CLASSIC STUFFING AND RICH BROWN GRAVY
*HAM WITH CLOVE STUDDED ORANGES AND MAPLE SYRUP
*BRINED HERB-CRUSTED TURKEY WITH SAUSAGE STUFFING AND APPLE CIDER GRAVY

*TWICE BAKED SWEET POTATOES WITH PECAN, CINNAMON, BUTTER AND BROWN  SUGAR TOPPING
*BOURSIN CREAMED SPINACH
*STEAMED PEAS AND PEARL ONIONS

*BAKED ROLLS
*SPICY CRANBERRY GINGER RELISH
*CRANBERRY ORANGE-PINEAPPLE SAUCE

*PUMPKIN CHEESECAKE WITH GINGER SNAP CRUST
*PUMPKIN ICECREAM

Esther is also bringing an apple pie and who knows what other goodies will show up on the harvest table!

Today I also want to talk about a do-ahead gravy that I made last week. It may be the best gravy I ever made and takes all the last minute frantic effort out of doing gravy when everyone is ready to sit down and eat. This gravy can be frozen for a couple weeks. I took this photo after freezing the gravy.


Here's another trick which you may want to try. I just learned about it. Cook white flour before using in a brown gravy or rich stew. It darkens the color and I believe removes any of that 'floury' taste that sometimes occurs. All you do is heat a dry, clean skillet over medium heat. Add 2 cups white flour and stir frequently with a wooden spoon or heat-proof spatula. Just as the flour begins to darken stir constantly. I stirred for 20 minutes and said "enough!", but the technique I read about said to stir for 50-60 minutes. The stirring is important as the flour can burn fairly easily which stirring avoids. This is how the flour looked before and after:


You can store the cooked flour for up to a year in the freezer.
DO-AHEAD RICH BROWN GRAVY
Ingredients:
1 large onion, chopped
2 carrots, chopped
2 stalks celery, chopped
1 Tbsp. olive oil/1 Tbsp. melted butter
Turkey parts-I used 2 large legs cut up by the butcher into 2" rounds. Necks or wings would also work well.
2 Tbsp. cold water
8 cups chicken or turkey stock
2 cups water
4 sprigs fresh thyme
1 large sage leaf
2 cloves garlic
3 Tbsp. butter
1/2 cup browned (or white) flour
Salt/Pepper to taste
Pinch of cayenne

Preparation:
Preheat oven to 400 degrees. Combine onion, carrots, celery, olive oil, 1 Tbsp. melted butter in a large roasting pan and toss to coat. Place the turkey parts on top of veg. Liberally add salt/pepper. Put the roasting pan in the preheated oven and cook until the turkey wings are browned and vegetables are caramelized and softened, 40-45 minutes.
Transfer turkey and veg to a large stockpot. Place the roasting pan over a stovetop burner on medium heat. Pour 2 Tbsp. cold water into the pan and bring to a boil, scraping up all browned bits. Transfer mixture to the stockpot and add 8 cups chicken or turkey stock and 2 cups water, thyme, sage leaf, garlic. Bring to a boil. Reduce heat to low and simmer, uncovered until meat falls off the bone, about 3 hours. Skim off turkey fat throughout the process and set aside 2 Tablespoons.
Strain turkey stock through a fine mesh strainer and reserve 6 cups of stock. When I made this, 6 cups was all that was left after it bubbled on the stove for 3 hours.
Heat 3 Tbsp. butter and 2 Tbsp. reserved turkey fat in a large saucepan over medium heat. Sprinkle in flour and cook, whisking continuously until it begins to thicken, 3-4 minutes. Simmer until desired thickness. Season with salt, pepper and a pinch of cayenne to taste.

On turkey-day I will scrape some of the turkey pan drippings into the pre-made gravy to give it a little more richness as it reheats. This recipe sounds like a lot of steps, but it is VERY easy and makes a perfect gravy. Next time I think I might try adding 1/2 cup dry vermouth or white wine or possibly some shitake mushrooms.

Yum! Yum!
Here are a couple more photos from today's parade...

Playing the fife while riding these crazy bicycles looks like no easy feat!


Preparing a big Thanksgiving dinner does not have to be stressful. By doing a few things ahead of time it takes a lot of the work out. Tomorrow I am going to share with you the recipe for the turkey I am making this year. It's one from Anne Burrell using some different techniques, but much of the work is done ahead.

I am incredibly grateful for the beautiful day I spent with my husband, cousins Joe and Kathe and tens of thousands of other people all feeling the spirit of this tremendous season. There was lots of love in the air.


Thanks, as always for sharing with me!
 

Sunday, November 17, 2013

Birthday Indulgence!

NOVEMBER 13, 2013-HAPPY BIRTHDAY JERRY!

My husband celebrated his birthday last week and I must say I really spoiled him. He was pampered, petted, indulged and WELL-FED! We started the day with breakfast in bed.
Gently Poached Duck Eggs atop Irish Smoked Salmon nestled on Whole Grain English Muffins.

I did not use my own method for poaching (see Perfect Soft Eggs March 9, 2013 blog) because the duck eggs are so large I was not sure they would fully poach so used a more traditional poaching method. I always add about a tsp. of cider vinegar to the water and a tsp. of salt. Bring the water to a gentle boil. Crack the egg in a separate small bowl and slowly slip the egg into the water. Do not boil hard. You may have to coax the whites to keep them together. Look at the size of this duck yolk!

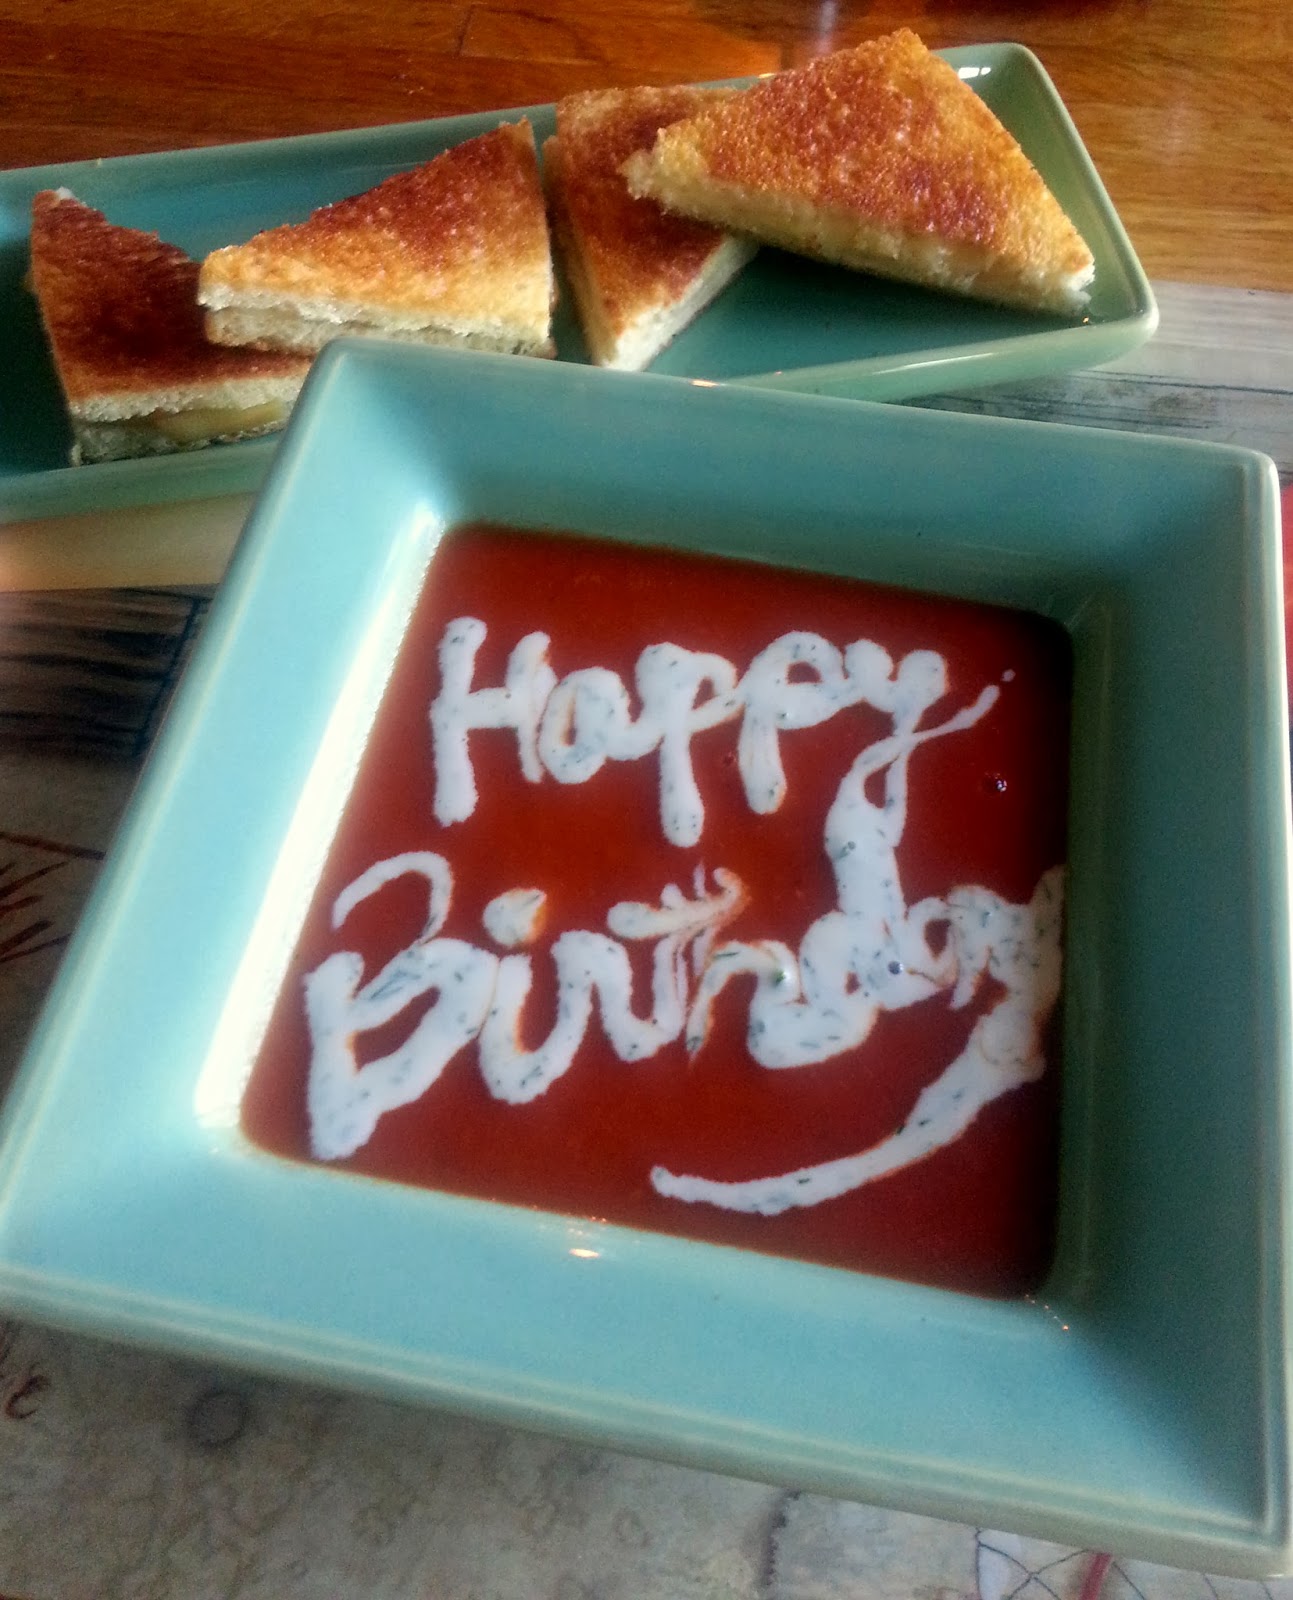
Recently I asked my husband about his favorite lunch as a kid growing up. Without hesitation he said Campbell's tomato soup and grilled cheese sandwiches so I surprised him with a variation of his childhood favorite. This soup is very easy to make and best if made the day before. I found the recipe online (www.finecooking.com/recipes/meyers-classic-tomato-soup.aspx) and they say the soup stores in the fridge as long as you boil it every 2 days. They also suggest it freezes well, which I am doing with the leftovers so we will see.
Because I was not the Birthday Girl, I put a simple squiggly garnish on my bowl of soup.
CLASSIC TOMATO SOUP

Ingredients:
2 Tbsp. Olive Oil
1 Tbsp. unsalted butter
1 large white onion, finely chopped
1 large clove garlic, smashed and peeled
2 Tbsp. flour
3 cups chicken broth (I generally have home-made on hand, but did not this time so used Swanson's.)
28 oz. can whole peeled plum tomatoes (including the juice)
1 1/2 tsp. sugar
1 sprig fresh thyme
Salt/Pepper to taste
3 Tbsp. finely chopped fresh dill (or other herb like Basil or Chives)
Creme Fraiche Horseradish/Dill garnish, optional

Preparation:
Heat the olive oil and butter in a large soup pot over medium low heat. Add onions and garlic and cook stirring occasionally until soft, but not browned, about 8 minutes. Add the flour and stir to coat the onion and garlic. Add the broth, tomatoes, sugar, thyme, 3 Tbsp. dill and 1/4 tsp. each of salt and pepper. Bring to a simmer over medium-high heat while stirring the mixture to make sure the flour is not sticking. Reduce heat to low, cover, and simmer for 40 minutes.
Discard the thyme sprig. Let cool briefly and then puree in 2 to 3 batches in a blender or food processor. I know you know this, but use caution when blending hot liquids. They really can explode. I know this from experience. ;-0 Rinse out the soup pot and return the pureed soup to the pot. Taste for seasoning and adjust salt/pepper if necessary. Either put it in the fridge or reheat to serve.

Garnish:
Mix 1/2 cup creme fraiche with 1 Tbsp. minced fresh dill and 1 Tbsp. well-drained horseradish; a little salt and pepper. Because I like to play with my food I put the garnish in a honey-bear plastic bottle and scripted the birthday message on Jerry's soup and used a squiggle design on mine. A simple dollop would also work. The topping added a lot to making a simple classic soup very special.

The grilled cheese sandwiches were made with a smoked Gruyere. Perfect complement to the old-fashioned, comforting soup on a cool fall day.

THE MAIN EVENT...


LOBSTER MAC AND CHEESE
When I am using a new recipe I usually do not deviate from ingredients or instructions until I have made it once and then do my own tweaking. This was also a new recipe for me from Ina Garten (Food Network's Bare-Foot Contessa) and it was ridiculously delicious! No tweaking necessary!

Ingredients:
Kosher salt
1 lb. Cavatappi or elbow macaroni*
1 qt. milk
8 Tbsp. (yes, that is 1 stick) unsalted butter, divided
1/2 cup flour
12 oz. Gruyere cheese, grated (about 4 cups)**
8 oz. extra-sharp Cheddar, grated (about 2 cups)
1/2 tsp. freshly ground black pepper
1 tsp. salt
1/2 tsp. nutmeg
1 1/2 lb. cooked lobster meat (I used 3 chix-1 1/4 lb. lobsters***)
1 1/2 cups white bread crumbs (crust removed)

*     I like the Cavatappi because it is a little heavier and its curly shape holds lots of sauce.
**   I didn't have enough Gruyere so used 3 cups of each.
*** I steamed, cleaned and chopped the lobster the night before, which made the preparation much easier.


Preparation:
Drizzle olive oil into a large pot of boiling, salted water. Add the pasta and cook per directions; 6-8 minutes. Drain well. Set aside.
Heat the milk in a small saucepan, but do not boil. In a large pot, melt 6 Tbsp. butter and add flour. Cook over low heat for 2 minutes, stirring with a whisk. Still whisking, add the hot milk and cook for a few more minutes (5-8) until thickened and smooth. Off the heat, add the Gruyere, Cheddar, 1 tsp. salt, pepper, and nutmeg. Add the cooked macaroni and lobster and stir well. Place the mixture in either 6 to 8 individual buttered gratin dishes or one large buttered casserole. I actually divided into 1 medium casserole and 1 small casserole intending to freeze the small dish. I also wanted to use all of the lobster in the larger casserole so left the smaller one as a plain mac and cheese.

Melt the 2 remaining Tbsp. of butter, combine them with the fresh bread crumbs and sprinkle on the top. Bake for 30-35 minutes or until the sauce is bubbly and the macaroni is browned on top.

Jerry is not a major fan of cake so I decided to surprise him with a very special pie. I also know a charming  young lady from Spiddal who would LOVE this pie as it contains her favorite combination of chocolate and peanut butter-GENUINELY. Hi Clodagh!
 
FROZEN CHOCOLATE-PEANUT BUTTER PIE


This pie is fairly easy to make although I did have some mis-steps and since I have promised to share not only the things that go right, but those that don't, I will tell you the story.

A trick for whipping cream is to put the bowl, beaters and the cream in the freezer for a few minutes before you start whipping. The chilled utensils and cream whip up faster so that is what I did. Unfortunately I did not thoroughly read the recipe ahead of time to see that I needed to make the crust and let it cool completely before adding the filling. Because the crust needed about an hour to put together including cooling time, I forgot about the cream which froze nearly solid. I ran it under hot water and loosened it enough to squirt out of the container, but what was intended to speed things up actually really slowed them down! The lesson here, read the directions thoroughly before starting your recipe...and, in this case, make the crust earlier in the day.

Ingredients:
For the Crust:
1 3/4 cups chocolate cookie crumbs (I like the Nabisco brand Famous Chocolate Wafers.)
3 Tbsp. dark brown sugar
6 Tbsp. unsalted butter, melted
Pinch of salt

For the Filling:
6 oz. cream cheese, at room temp
3/4 cup powdered sugar
1 tsp. Kosher salt
1 1/4 cup creamy peanut butter (not chunky or natural; I used Skippy.)
1 Tbsp. vanilla
2 cups heavy cream

For the Topping Drizzle:
2 oz. good quality semisweet chocolate, finely chopped
2 Tbsp. peanut butter

Preparation:
To make the crust: Preheat oven to 350 degrees. Combine the cookie crumbs, brown sugar and salt in a medium bowl. Add the butter and toss with a fork until all the crumbs are moistened. Press into the bottom and up the sides of a 9" pie plate. Refrigerate for 15 minutes, then bake until set, about 8-10 minutes. Transfer to a wire rack to cool completely.

To make the filling: In a large bowl, beat the cream cheese, powdered sugar and salt until light and fluffy, about 3 minutes. Add the peanut butter and vanilla and beat again. In a separate bowl, whip the heavy cream until soft peaks form. Stir 1/3 of the whipped cream into the cream cheese mixture to lighten it up.


Using a rubber spatula gently fold in the remaining whipped cream. Transfer the filling to the cooled crust. Freeze uncovered for at least 4 hours and up to 1 day covered with plastic wrap.


I put the garnish on before freezing. To garnish the pie: Put the chocolate in a microwave-safe bowl and heat until melted (2 bursts of 15 seconds). Transfer to a zip-lock baggie and snip the end off one corner and drizzle over pie. Do the same with the peanut butter. We ate this pie after 4 hours in the freezer, but the consistency got even better with longer freezing. This may be the best pie I have ever eaten.


What a day of feasting we had!
Even JoJo got in on the fun!

 
THANK YOU FOR JOINING ME FOR
JERRY'S BIRTHDAY CELEBRATION!
 
THANKSGIVING IS RIGHT AROUND THE CORNER SO THAT MEANS MORE FESTIVE HOLIDAY COOKING.
 
TUNE IN AGAIN SOON FOR MY THANKSGIVING DAY MENU WHICH WILL INCLUDE TRADITIONAL FAVORITES ALONG WITH SOME NEW SUPRISES!