Monday, November 20, 2017

Happy Thanksgiving!

THANKSGIVING MENU 2017

This is going to be a different Thanksgiving for my husband, Jerry and me. In September I was diagnosed with breast cancer and tomorrow (2 days before Thanksgiving) am having my third surgery. As odd as it may sound, I feel happy, strong and very confident that this will soon be behind me, but in the meantime was not sure I would be up to cooking my usual big holiday feast. So I have prepared the entire meal in advance, freezing almost everything except the turkey, which my husband will cook Thanksgiving morning. Here is our menu:

Cranberry Orange Sauce with Fresh Ginger Root
Don't you want to just dive into that sauce?!?
I made this several days ago. It keeps well in the fridge for up to 2 weeks. I make a variation of it every year. Go to: http://cookwithcindy.blogspot.com/search?q=cranberry+sauce for the original recipe. This year I used half the sugar and all freshly squeezed orange juice for the liquid.
Homemade Dinner Rolls

(Go to: http://cookwithcindy.blogspot.com/search?q=do+ahead+rolls and scroll nearly to the bottom to get this recipe. I make them every year because they freeze well and that is one less thing to prepare as the big day approaches.

Green Bean Casserole with Cauliflower Cream
 

This is a take on the old fashioned (and pretty horrible) Canned green bean casserole with canned mushrooms and canned shoestring onions on top. This one looks a little better and was fairly easy to put together. The cauliflower cream is really delicious! You still have time to do this before Thursday. Recipe follows.

Triple Onion Mashed Potatoes

I believe this will freeze well, but have never tried so we will see! The addition of sautéed leeks looked wonderful and topping with crispy shallots and chives put this plain mashed potato recipe over the top. The recipe follows.

Roast Turkey Stuffed with
Pear/Sage and Golden Raisin Stuffing
 
This was my Nanna's roasting pan. It has seen many a turkey!
The Pear/Sage Stuffing has complex flavors and will only intensify when cooked in the bird on Thanksgiving morning. I know most caution about roasting your bird stuffed, but I have been eating turkey that way since a child and cooking it that way all my life, as has my Mom long before I was born so I will keep that tradition alive! Stuffing recipe follows.

And finally, my "DO-AHEAD GRAVY" will also be on our Thanksgiving table. Here is the link: http://cookwithcindy.blogspot.com/search?q=do+ahead+gravy You will love this gravy recipe. So silky with rich, deep flavors.

This is a winner. I do not like making gravy day of the holiday. Everyone is anxious to sit down and you are still toiling in the kitchen trying to get lumps out. This takes all the tension out of making gravy.
These are the turkey legs I used to make this year's gravy.
Looks like something you'd see on the Flintstones sideboard.
Green Bean Casserole with Cauliflower Cream

Ingredients:
1 cup chopped yellow onion (I used white.)
1/4 cup olive oil, divided
7/8 tsp. Kosher salt (I used 1 tsp. by measuring in the palm of my hand.)
3/4 tsp. black pepper, divided
1 lb. green  beans, cut into 2 inch pieces
12 oz. shitake mushrooms, stemmed and halved
1 8 oz. container cremini mushrooms, stemmed and halved
3 cups chopped cauliflower, about 9 oz.
1 1/2 cups 2% milk (I used 1 cup 2% milk and 1/2 cup half and half.)
2 dried bay leaves
2 thyme springs (My thyme is done for the year so used 1/2 tsp. dried.)
2 garlic cloves, crushed
1 Tbsp. sherry (I used 2.)
1/8 tsp. ground nutmeg
Cooking spray
3 oz. whole wheat bread crumbs (about 2 slices or 2 1/2 cups.)
Here are the roasted onion, mushrooms, and green beans.
Preparation:
Preheat oven to 425 degrees. Combine onion, 2 Tbsp. oil, 1/2 tsp. salt, 1/4 tsp. pepper, green beans, and mushrooms on a foil-lined baking sheet. Bake at 425 degrees for about 15-20 minutes.
Bring cauliflower and next 5 ingredients (through garlic) to a simmer in a saucepan over medium heat; cook 25 minutes or until tender. Remove pan from heat. Let cool slightly. Carefully place cauliflower mixture in blender; blend until very smooth. Return puree to pan; stir in remaining 1/2 tsp. salt, remaining 1/2 tsp. pepper, and sherry and nutmeg. Place green been mixture in a 9x9 inch baking dish coated with cooking spray; top with bread crumbs that have been mixed with 2+Tbsp. oil. Sprinkle over dish. At this point, I froze, and will thaw completely before baking for 10 minutes at 425 degrees.

Triple Onion Mashed Potatoes
Ingredients:
1 1/2 lbs. Yukon Gold potatoes, peeled and cubed
1/2 cup chicken stock
1/4 cup half and half
1 1/2 oz. cream cheese, softened and cut into pieces
3/4 tsp. Kosher salt
1/4 tsp. black pepper
1 1/2 Tbsp. unsalted butter (I used 2 1/2.)
1 cup chopped leeks
1 1/2 Tbsp. canola oil (I used olive oil.)
1/2 cup sliced shallots
1 Tbsp. chopped fresh chives

Preparation:
Bring potatoes to a boil in a large Dutch oven or saucepan filled with water. Reduce heat to medium; simmer 20 minutes or until tender. Drain; return potatoes to pan. Add chicken stock, half and half, cream cheese, salt, pepper. Mash to desired consistency.
Melt butter in a skillet over medium-high heat. Add leeks; saute 5 minutes. Stir leek mixture into potato mixture. Do not wipe out skillet.
At this point I froze the potatoes and will finish the crispy shallots and chives on Thanksgiving morning, but if you are making on the spot...return skillet to medium-high. Add oil and shallots; cook 3 minutes or until shallots are browned and crisp. Spoon mashed potatoes into a serving dish and top with crispy shallots and chives.

Pear/Sage and Golden Raisin Stuffing

This is a recipe from Cooking Light, which I have changed up a bit, so not quite so light.

Ingredients:
1 loaf homemade or bakery style white bread, sliced and cut into 3/4 inch cubes
1/2 cup golden raisins
1/4 cup hot water
2 thick-cut bacon slices
2 cups onion
1 cup chopped celery
2 Tbsp. Bell's seasoning
3 Tbsp. fresh sage, chopped
1 Tbsp. minced garlic
1 1/2 cups chicken stock
5 Tbsp. butter, melted
1/2 tsp. black pepper
2 large eggs
1 1/2 cups chopped ripe Bosc pear (about 2 large)
Cooking Spray

Preparation:
Preheat oven to 400 degrees. Toss bread cubes in various herbs and spices: finely diced fresh rosemary, fresh sage, Bell's seasoning, garlic powder, onion powder, Salt. Arrange bread cubes in single layer on a rimmed baking sheet. Bake at 400 for 20 minutes or until golden, stirring after 10 minutes. Place bread cubes in a large bowl. Reduce oven  temp to 350 degrees.
Place raisins in 1/4 cup hot water to plump. Let stand 10 minutes. Drain.
Cook bacon slices in a skillet over medium heat until crispy; about 10 minutes. Remove to paper towel-lined plate; crumble. Add 1 Tbsp. butter to bacon drippings, onion, celery and saute for 8 minutes. Add 1 Tbsp. sage and garlic; cook 1 minute more. Remove pan from heat.
Combine stock, butter, pepper, and eggs in a large bowl. Add stock mixture, drained raisins, bacon, pear, and veg mixture to bread. Toss to combine. At this point I froze and will thaw completely before stuffing the bird. You may also coat a 2 quart baking dish with cooking spray and bake at 350 degrees for 25 minutes, if you do not want to stuff it in the bird. If you cook it separately it should be called Un-Stuffing.


I have so much to be grateful for and even though currently experiencing cancer, believe that cancer can provide many gifts--
The outpouring of love from friends and  family has been overwhelming. The love and devotion from my husband has served to strengthen our wonderful relationship. And I truly feel this has brought me closer to God.

HAPPY THANKSGIVING
FROM MY KITCHEN TO YOURS!
My husband, Jerry and I, celebrating his birthday
at Hacienda del Sol in Tucson. Fabulous, elegant, and understated Ranch.
November 13, 2017


Monday, October 30, 2017

SOUP SEASON!

It's finally beginning to feel like fall here in beautiful southern Arizona and time to start making soup!
MINESTRONE SOUP
The Minestrone is all cooked. I will reheat and drop in the
meatballs when the soup is served and top with chopped
fresh parsley and a little parmesan cheese.
An Italian classic, you do not really need a recipe for Minestrone Soup, but it generally contains seasonal vegetables--carrot, onion, celery, potato; beans-cannellini or some other type of bean; pasta or rice. This soup dates back to 30 AD where a recipe appears in Marcus Apicius's ancient cookbook De Re Coquinaria (which translates to On The Subject of Cooking) described as polus, a Roman soup made up of farro, chickpeas, and fava beans, with onions, garlic, lard, and greens thrown in...that sounds a little heavy to me, and in fact, over time the recipe has changed quite a bit to include more veg and depending on the season and availability meat or chicken. 

I like to add meatballs to Minestrone, either beef or chicken, and this morning decided on spicy chicken meatballs. Again, completely up to you. Here is the recipe I came up with.

Ingredients:
1 Qt. chicken stock (I had some in the freezer, which made things easier.)
2 stalks celery, chopped
1 small onion, peeled and chopped
3 carrots, peeled and chopped
1 potato, peeled and chopped
1/4 tsp. dried thyme
1/4 tsp. dried sage
Bay leaf
1 cup chopped canned tomatoes, in their broth
1 Tbsp. tomato paste
1 15 oz. can Cannellini beans, rinsed and drained well
1 cup pasta (I used cellentani which is a thick curly pasta and holds up well in soup.)
1/2 cup fresh parsley, chopped
4 Tbsp. fresh oregano (or 1 tsp. dried)
2 cloves garlic, chopped
Salt/Pepper to taste
You don't have to chop the veg too finely.
I like them kind of chunky because this is a rustic soup.
Preparation:
In a large stock or soup pot bring chicken stock to a boil. Add celery and onions. Reduce heat to a gentle boil (medium-low). Cook for 10 minutes. Add carrots and potatoes. Continue cooking another 10 minutes. Add 1 cup diced tomatoes, tomato paste, thyme, sage, bay leaf and cook another 10 minutes. Add beans and cook another 10 minutes. Add pasta, garlic, fresh parsley and oregano. If you are eating the soup right away cook for 10 minutes. If not, only cook the pasta for 5 minutes or it will get mushy. Take off heat, let cool, and either package for fridge for the next couple days or freeze to have down the road.

And, next is my recipe for SPICY CHICKEN MEATBALLS. Make these meatballs as mellow or spicy as you like. Just reduce red pepper flake and black pepper to get a milder ball.

Ingredients:
6 chicken tenders
1 large or 2 small cloves garlic, minced
4 Tbsp. minced onion
1/2 tsp. salt
1/2 tsp. freshly ground black pepper
1/2 tsp. hot red pepper flake
1 Egg
1 cup panko bread crumbs
1/2 cup parmesan cheese
1 tsp. dried Italian herb mix
2 Tbsp. plus more for frying meatballs

Preparation:
To start remove any chewy white tendons. This is kind of a pain, but you will be happier with the end result...a much more tender ball.

Next, chop the chicken breasts. I used my gorgeous meat clever that my husband, Jerry bought me earlier this year, but any very sharp knife will work. Mince the chicken.
Add garlic, onion, salt, peppers, 1 egg, panko crumbs and parmesan. Gently work all ingredients using your hands until well mixed. Form balls (the chicken will be quite loose and moist) and let the balls sit for about 15-20 minutes to help them firm up and dry out a bit.
This recipe made 17 balls so you may not
need all for the Minestrone, but they freeze well.
Heat olive oil in a heavy skillet until smoking. By starting on a high heat you get a nice crust on the ball. Gently drop a few balls in, lower heat, and brown well on all sides rolling around in the pan. Cook only 6 balls at a time to give yourself room to turn the balls. Reduce heat further and cook for another 10 minutes. Remove and repeat with uncooked balls.

Many soups, including this one, offer a license for total creativity. Please let me know what you come up with!

Here's another soup I put together that turned out really well. I recently learned that wild mushrooms, especially these Asian mushrooms are really good for you. Healthy + Tasty = GOOD.

WILD MUSHROOM AND LENTIL SOUP

This is another recipe where you can take many liberties, but here are the basics.

Ingredients:
1 Qt. rich chicken stock*
2 cloves garlic, minced
1/2 onion, minced
1 package each of, all roughly chopped:
Bunashimeji-I think these were the Enoki variety
Maitake aka Hen-of-the-Wood
Bunapi or white beech mushroom (I have so much to learn about Japanese mushrooms and cuisine in general!)
1 Tbsp. Yuzo** (You don't really need this, but I do think this paste gave a great flavor and depth to the soup. You can get it online or it might be equally good without out it and choose other flavors of your  choice.)
1/2 cup roughly chopped Thai (or regular) Basil
2 cups cooked lentils
Preparation:
Bring 1 quart of rich chicken broth to boil in a large soup pan. Add minced onion and garlic and slowly simmer for about 20 minutes. I wanted this soup to be all about the mushrooms so did not want to heavily season with other herbs.
Lower heat to a very gentle boil and add Yuzo and all the mushrooms. Simmer for another 20 minutes. Add the pre-cooked lentils and basil and simmer for another 15 minutes. Delicious on the spot or holds well in the fridge for 10 days.

*To make rich chicken stock: Make a regular chicken stock and then re-cook with another batch of bones and herbs. Yum! Yum! Yum! Very rich and so much better for you because of all that collagan, but most importantly the taste.

** A quick word about Yuzo Kosho. I am still learning about yuzu, but this spice is amazing! This paste is made from fresh chiles, fermented with salt along with the zest and juice of yuzu, a tart, fragrant East Asian citrus. It's lemony, limey, luscious and delicious! I will try it in many different recipes.

IS THAT ALL FOR TODAY?
 
I COULD GO ON ALL NIGHT TALKING
ABOUT FOOD, FOOD, GLORIOUS FOOD!
 
HOPE YOU ENJOYED THESE COUPLE OF SOUP RECIPES AND PLEASE REMEMBER...SOUP IS NOT LIKE 'BAKING'...YOU DON'T HAVE TO MEASURE AND YOU CAN GET VERY CREATIVE.
 
HOLIDAY SEASON FAST APPROACHING WITH MY HUSBAND'S BIRTHDAY (NOVEMBER 13th)
BEING THE KICK OFF FOR US!
 
GOOD TIMES AHEAD IN THE KITCHEN!
 
WITH LOVE
 
 
STAY TUNED FOR MANY FUN FOOD ADVENTURES.

Sunday, October 22, 2017

MY NEW MOROCCAN TAGINE!

I received this lovely North African cooking vessel from my good friends, Dennis and Diana Makes 3 years ago, and I have been hesitant to use it. Why, I am not sure, as I generally am not shy about anything in the kitchen. I have never cooked in a Tagine and am still perplexed I did not do the research right away to see how easy (and fun!) it is to use. I am so glad I finally did. What a great night we had cooking together. If cooking in your Tagine for the first time, you have to "cure" or "season" it.
First, soak both top and bottom for several hours or overnight in water. I have a round prep sink that was the perfect size for soaking both pieces. Dry well. Next, place in a cold oven set for 300 degrees and "cook" for 2 hours. Turn the oven off and let the Tagine cool in the oven. When cool, gently hand wash in soapy water. Dry and rub lightly with olive oil for storage. Now you are ready to cook!

Now that I have used it I can see the possibilities for great combinations of spices, herbs and flavors; meats, sauces, fish, are endless! Here is the first recipe we tried, which I found online at Simply Recipes. I followed fairly closely, with only a couple variations, since it was my first time.
MOROCCAN CHICKEN
WITH LEMON AND OLIVES
Ingredients:
2 tsp. paprika (I also added 1 tsp. smoked paprika)
1 tsp. ground cumin
1 tsp. ground ginger (I also added some fresh ginger root zest before cooking.)
1/2 tsp. cinnamon
1/4 tsp. freshly ground black pepper
2 Tbsp. Olive Oil
1 chicken, 3-4 lbs., cut into 8 pieces (I used 4 large chicken thighs, bone in, skin on)
Salt
3 cloves minced garlic
1 onion chopped
The rind from 1 preserved lemon rinsed in cold water, pulp discarded, rind cut into thin strips (Recipe says regular lemon works, too, but it is easy to make preserved lemon*.)
1 cup green olives (I used Castlevetrano.)
1/2 cup raisins
1/2 cup water
1/4 cup fresh cilantro, chopped
1/4 cup fresh parsley, chopped (Had no parsley so used more cilantro.)
Preparing the green beans, which accompanied our meal.
 
Preparation:
Diana prefers to set all the ingredients out before beginning her cooking so that is what we did. I go back and forth, but was happy to do it that way since she was the guest in my kitchen. It does help you to NOT forget an ingredient.
Make the spice rub by combining all spices--paprika, cumin, ginger, turmeric, cinnamon, black pepper--in a large bowl. Pat the chicken pieces dry and put in the bowl, coat well with the spice mixture. Let the chicken stand for one hour in the spices. I like to put the pieces in a zip lock bag so every so often you can turn them easily to ensure that all pieces get the benefit of the spice rub.
Add the olive oil to the Tagine. Brown the chicken on medium heat in your Tagine (you can also use an ordinary skillet, but this is much more exotic!). If you are using a clay Tagine on top of the stove you must place a heat diffuser underneath to prevent it from cracking.  Sprinkle the chicken very lightly with salt (both olives and preserved lemon are salty). Cook for 5 minutes or until lightly browned.
All ingredients together.
Ready to cook for the last 30 minutes.
Here I am adding the onions.
Add garlic and onions, (and freshly grated ginger root if you are using it) and water, then cover and simmer: Turn chicken pieces over. Add the lemon slices, olives, raisins, and 1/2 cup water.
Bring to a simmer on medium heat, then lower heat to low, cover, and cook for an additional 30 minutes until chicken is cooked through and tender.
Stir in parsley and cilantro. Adjust seasoning to taste.
Served with lightly steamed green beans seasoned with
a tbsp. of butter and fat tsp. of Dijon mustard
and farro cooked in rich chicken broth topped with fresh cilantro.
 
To make preserved lemon:
 
Place 3 to 4 lemons in a container large enough to cover with water. Add 3 Tbsp. Kosher salt, a few peppercorns and the juice of 1/2 lemon.
 
I am tasting this delicious dish all over again. Wish it was on the menu tonight! I will let you know what I come up with next using my beautiful Tagine.
 
Until next time...
 
Besseha and Ma-saa Al Kh-ir!
 
(Bon Appetit and Good night!)
 
Tune in again soon for another episode of:


Monday, October 16, 2017

PROSCIUTTO WRAPPED CHICKEN WITH SAGE!

This recipe came to me via my friend, Debby Vis, which she got from her "America's Test Kitchen-6 Ingredient Recipes" cookbook. I have been a fan of Christopher Kimball's "Cooks Illustrated" for many years so was delighted to try this easy chicken dish. It's a simplified version of the Italian classic Chicken Saltimbocca, but was a snap to put together. It took me under 30 minutes to prepare and cook this meal. I did make it an 8 ingredient dish, but it was still very easy to put together! I added basil pesto inside the chicken breasts and topped with pomegranate seeds from my own pomegranate tree. Both ingredients are optional.
 

Ingredients:
4 boneless skinless chicken breasts
8 thin slices prosciutto
1 Tbsp. olive oil
Fresh sage (This recipe calls for chopping the sage, but I prefer leaving the leaves whole and frying them with the chicken.)
1 Lemon (I also added a little lemon zest to the cooked chicken breasts.)
4 Tbsp. unsalted butter
Basil Pesto, optional
Pomegranate seeds, also optional, but they do add a nice pop to the dish!

Preparation:
Preheat oven to 400 degrees. Trim chicken, rinse and pat dry. Season with salt/pepper. If you are using the basil pesto, cut a slit along the fat end of the chicken breast and put 2+ tsp. basil pesto into the slice. Slightly overlap 2 slices of prosciutto on cutting board and lay 1 chicken breast in center; fold prosciutto over chicken. Repeat with remaining prosciutto and chicken. 

Heat oil in a 12" nonstick skillet over medium high heat until just smoking. Place chicken in skillet and cook until lightly browned on both sides, 6-8 minutes. I deviated from the recipe here, too, by adding the whole sage leaves (about 1/3 cup of leaves) into the pan as I was browning the chicken. The sage then becomes nicely fried and sticks to the chicken.

Transfer chicken to rimmed baking sheet and bake until it registers 160 degrees, 10-12 minutes. Transfer chicken to a platter and cover to keep warm.

If you are following the original recipe, mince 2 tsp. sage and squeeze juice from a lemon into a bowl. Melt butter in now-empty skillet over medium-high heat, swirling occasionally, until butter is browned and has a nutty aroma, about 1 1/2 minutes. Off heat, stir in sage, pinch of salt and 1/8 tsp. pepper. Drizzle sauce over chicken and serve. If you are making this dish as I did, still make this brown butter as it is a wonderful sauce, which pulls the dish together.

I served the Prosciutto Wrapped Chicken with Butternut Squash, which had a unique addition, thanks to Debby's husband, Steve's creative cookery.
What is that mystery ingredient?
Debby served me this wonderful chicken dish the other day along with the Butternut Squash and a Tomato Caprese salad. The squash had a unique flavor that I could not identify. After questioning, she told me her husband Steve added a big tablespoon of vanilla ice cream to the squash after mashing. The rich, sweetness of the ice cream was the perfect addition. Thank you, Steve! I would have never thought of that!

Peel the squash. Cube into 1 inch pieces. Cook in salted water until very tender. Drain. Add 4 Tbsp. butter, salt, pepper, cinnamon, and the surprisingly delicious vanilla ice cream (one fat tablespoon)!

To complete this meal, I made a salad of sliced cherry tomato, black olive, feta cheese, and chives, drizzled with a white balsamic vinegar. I made this meal for my friend Paula Schaper.
Paula seems pretty excited to drop that
ice cream into the Butternut Squash!
Cooking with friends is so much fun!

I have a very exciting blog in mind for next time.
Last night I used, for the first time, my beautiful tagine, which was a special gift from other good friends,
Dennis and Diana Makes.
I think you will like this
Moroccan Chicken with Lemon and Green Olives!
 
Tune in again soon...
 
FOOD IS LOVE!


Saturday, September 16, 2017

COOKIES AND ICE CREAM!

Looking for a rich and decadent dessert? Try this one...a grown-up version of your favorite childhood sandwich!

PEANUT BUTTER AND JELLY ICE CREAM
 
WITH PEANUT BUTTER AND JELLY
SANDWICH COOKIES

For the Ice Cream-

Ingredients:
1 1/2 cups whole milk, divided
1 Tbsp. cornstarch
1/2 cup unsalted natural peanut butter (I used salted.)
1/2 tsp. salt
1 3/4 cups heavy cream
2/3 cup sugar
3/4 cup good quality strawberry jam (or whatever jam flavor you prefer)

Preparation:
Fill a large bowl with ice water. In a small bowl, combine 2 Tbsp. milk with the cornstarch. Whisk and set aside. Whisk the peanut butter and salt in a medium bowl and set aside. Combine the remaining milk with the heavy cream and sugar in a medium saucepan and place over medium heat. Bring the milk mixture to a low boil. Cook until the sugar dissolves, about 3 minutes. Remove from the heat and whisk in the cornstarch mixture. Return to a boil over high heat until the mixture is slightly thickened, about 1 minute. Pour into the bowl with the peanut butter and whisk until smooth. Set the bowl in the ice bath to cool, about 20 minutes, whisking occasionally. Cover and refrigerate until chilled, at least 4 hours or overnight. I like to do this step the day before churning so always chill it overnight. Pour chilled ice cream base into your ice cream maker and churn according to manufacturers instructions. This batch took about 20 minutes. Spoon a small layer of jam into a freezer-safe container and lightly spoon a layer of ice cream on top. Continue to alternate layers of jam and ice cream until the container is full. Gently swirl the layers with a spoon, careful not to muddy the ice cream. Freeze until firm, at least 4 hours. Makes 1 generous quart.

The texture of this ice cream was perfect. I found the recipe online, but don't remember exactly the source. Really fun combination of flavors!

And now for the cookies-

Ingredients:

COOKIE DOUGH
1 1/2 cups flour
1 1/2 tsp. baking soda
1/4 tsp. kosher salt
1 stick unsalted butter, at room temp
1/2 cup lightly packed light brown sugar
1/2 cup granulated sugar
1 large egg
1/2 tsp. vanilla
1/2 cup creamy natural peanut butter
1/4 cup chopped honey roasted peanuts for topping

FILLING
1/3 cup peanut butter
5 Tbsp. unsalted butter, softened
1/4 cup confectioners sugar
1/4 tsp. vanilla
1/8 tsp. kosher salt

1/4 cup strawberry jam (or whatever your favorite is!)

Start by making the dough. Preheat oven to 350 degrees. Line 2 large baking sheets with parchment paper. In a medium bowl, whisk flour, baking soda and salt. In another medium bowl, using a hand mixer, beat the butter with both sugars at medium speed until light and fluffy, about 3 minutes. Beat in the egg and vanilla, then beat in the dry ingredients in 3 batches, mixing well between additions. Fold in the peanut butter until fully incorporated.

Scoop 24 1 inch balls of dough onto the baking sheets at least 2" apart. Press the balls down slightly; they should be about 1 1/2" in diameter. Sprinkle the tops with chopped peanuts. Bake the cookies for 10-12 minutes until the edges are light golden brown and tops are slightly cracked; rotate the baking sheets halfway through. Let the cookies cool for 10 minutes on the baking sheet, then transfer to a rack to let cool completely.

While the cookies are baking, make the filling.

In a bowl, using a hand mixer, whip the peanut butter with the butter, confectioners sugar, vanilla and salt at medium speed until fluffy, about 3 minutes. Refrigerate for about 45 minutes until chilled.

Spoon 1 1/2 Tbsp. of the filling on the underside of 12 cookies. Spread 1 tsp. of jam on the underside of the remaining cookies. Sandwich the halves together and serve.

These cookies are ridiculously good. This recipe came from Food and Wine Magazine and they got it courtesy of Chef Tiffany MacIssac, Owner of Washington D.C.'s Buttercream Bakeshop. I'd like to visit that bakery!

I'm going to share one more ice cream recipe with you today. This was my own creation and my first attempt at making a recipe for ice cream. And, I just happened to have some goats milk on hand! Most ice cream calls for 1 or more eggs, but since the recipe above was eggless I decided to make this one eggless, too.
 
STRAWBERRY CHEESECAKE ICE CREAM
I served with empanadas from our local bakery.

Ingredients:
2 1/2 cups goats milk
8 oz. cream cheese
1 Tbsp. cornstarch
1/2 tsp. salt
3/4 cup half and half
1/4 cup sugar plus 2 Tbsp. sugar
1/2 cup strawberry jam

1 cup fresh strawberries, sliced

Gently heat the sliced strawberries with 2 Tbsp. sugar until sugar is dissolved. Put the berries in a bowl and chill in the refrigerator until ready to churn.

I basically used the technique above using these ingredients. Stirring continuously, heat the goats milk, cream cheese half and half, salt, and sugar until the cheese melts and mixture comes to a gentle boil. Remove from the heat and add the cornstarch mixture and 1/2 cup strawberry jam. Return to high heat and bring once more to a boil. Pour into a bowl and cool quickly in the ice water bath for about 20 minutes. Then place in fridge overnight to completely chill before churning. Once you have chilled the ice cream base, pour into your ice cream maker. As it begins to churn add the fresh strawberries that have been cooked down a bit in the sugar. Churn until the desired consistency is reached; about 20 minutes. Place in freezer for a few hours to firm up.

I will admit the texture of this ice cream was not perfect, but the flavor was delicious. I think the cream cheese made the texture a little icy. Maybe next time add 2 eggs to the ice cream base to create a custard with the cream cheese.

All for today!
Fall is just around the corner.
Days in southern Arizona will begin cooling off.
Time to do more cooking!
 
Tune in again soon, for another episode of:


Monday, August 28, 2017

PIZZA...AS EASY AS PIE!

Last night I made a Salami Pizza using my new pizza pan. Because of the perforated pan I think the pizza cooked more evenly and the bottom crust was perfectly browned. I had made this pizza dough a few weeks ago and froze 2 of the 3 portions. The dough did not rise as much after being frozen, but was still delicious and made a beautifully thin crusted pizza.
A few days ago I made a really rich tomato sauce so putting this pizza together was fast and easy. Of course you can use sauce in a jar, but it is more fun and much better to make your own!
Recipe for the dough is from Giada De Laurentis. I love most of her recipes and this one is no exception.
 
PIZZA DOUGH
Ingredients:
1 1/2 cups warm water (100-110 degrees), plus extra as needed
1 packet active dry yeast (I Tbsp.)
4 cups all-purpose flour, plus extra as needed
1 1/2 tsp. fine sea salt
Olive oil for drizzling

Preparation:
Put the water in a small bowl. Add the yeast and stir until dissolved. In a large bowl, whisk the flour and salt together. Add the yeast mixture and stir until a soft dough forms. If the dough is too dry, add a little more water, 1 Tbsp. at a time. If the dough is too sticky, add more flour, also 1 Tbsp. at a time. Transfer the dough to a floured work surface. With floured hands, knead the dough until it becomes smooth and elastic, about 10-12 minutes. That is a lot of kneading, but I believe that is why this dough is so tender and yummy. Drizzle the inside of a clean bowl with olive oil. Put the dough in the bowl, roll it around to coat with oil. Cover loosely with plastic wrap or kitchen towel. Set the bowl in a warm, draft-free place (not easy in Ireland!), until the dough has doubled in size; about 2 hours.

Using a fist, punch down the dough in the center and cut it into 3 equal-sized pieces. Form the dough pieces into 3 balls and put in oiled bowls. Cover each bowl loosely and let rest for another hour. Remove the dough and wrap in plastic. Refrigerate up to 1 day, or freeze as I did for a couple weeks, or use straight away.
Using your fingers gently spread the dough out on a pizza pan or cookie sheet. As you can see my dough did not quite reach the edges of the pan, but that is no problem.
Drizzle with red sauce and then add whatever toppings you like. 68% of Americans prefer meat toppings and pepperoni is the most popular choice, but experiment with different veg: eggplant, roasted red pepper, cauliflower.
Pizza ready to bake.

I topped with Salami Milano and Coppa Salami, freshly grated Parmesan and Mozzarella cheeses. Salami Milano is a cured sausage consisting of fermented air-dried pork or beef. I used pork. Coppa or Capocolla is a traditional Italian and Corsican sausage made from the dry-cured muscle running from the neck to the pig shoulder.

To cook your pizza pie, preheat oven to 375 degrees. Cook for about 20 minutes depending on your preference of crispy or doughy crust. Let rest a couple minutes, then slice, and EAT!
Each man, woman and child in America eats an average of
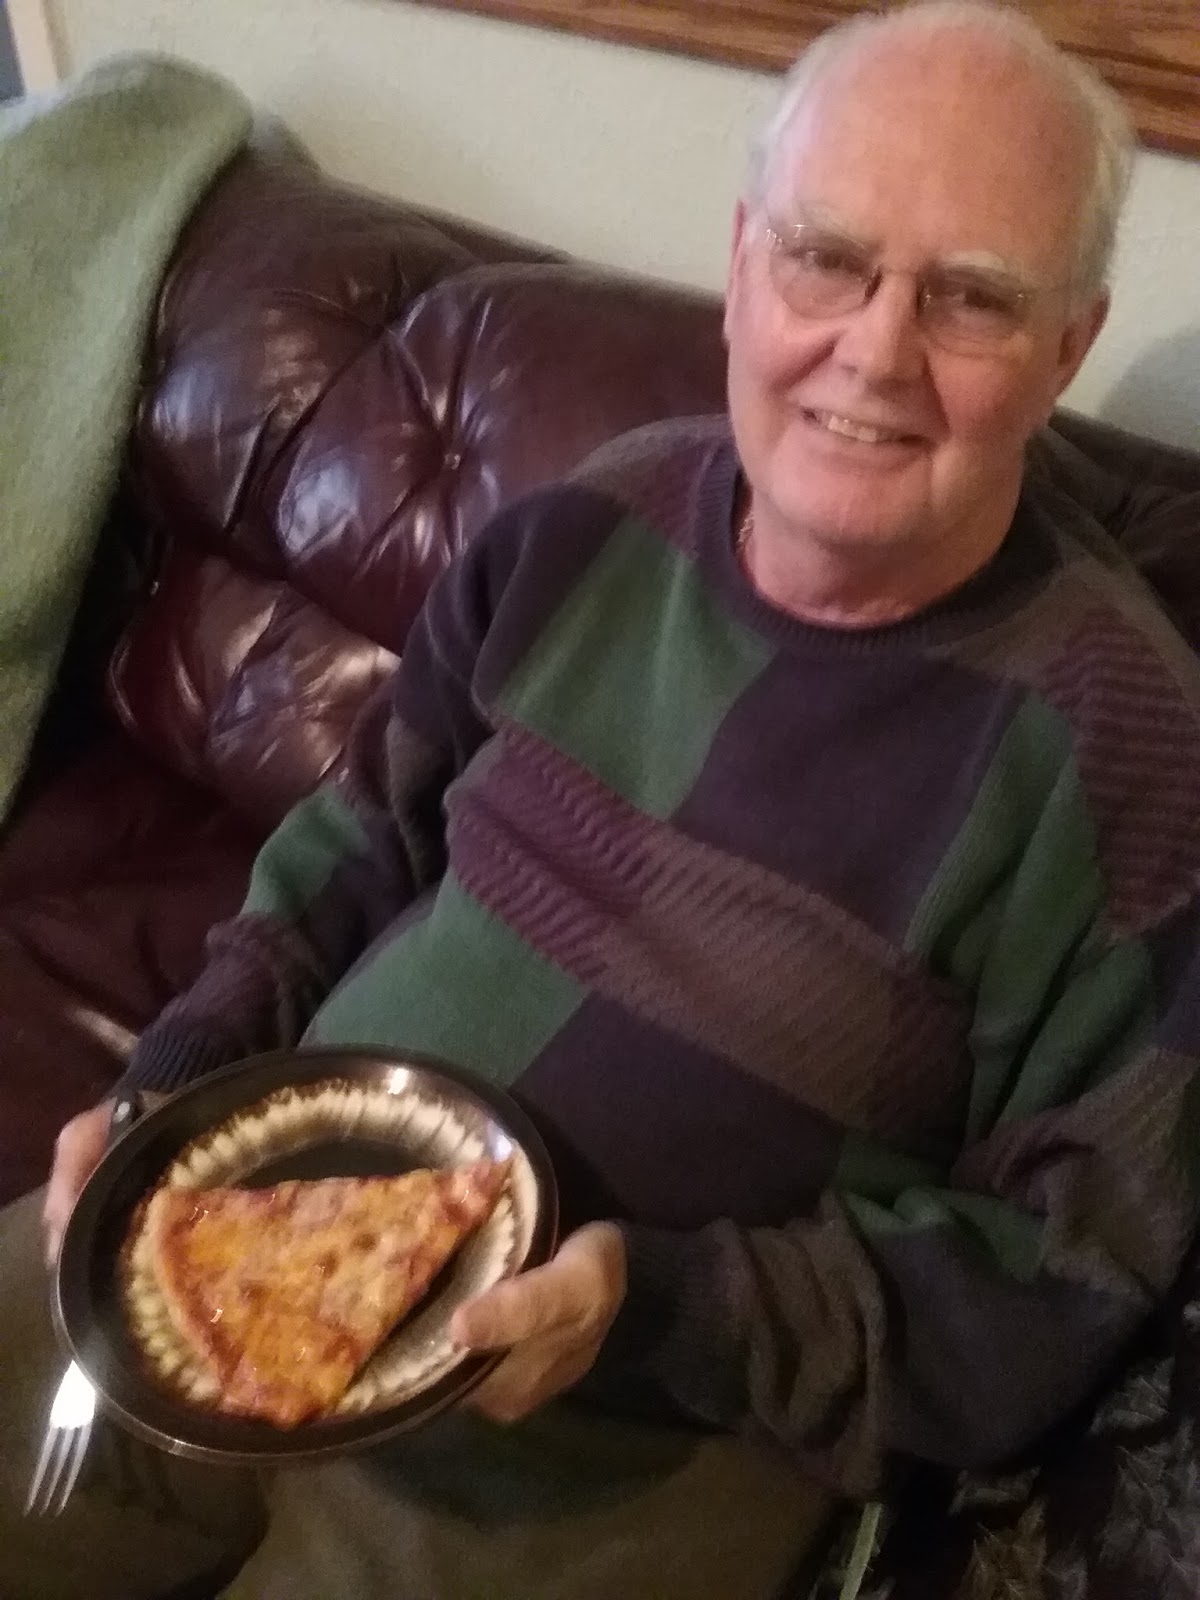
46 slices of pizza per year. My husband, Jerry, loves pizza! 
That's all for today. We are leaving Ireland in less than 2 weeks returning to the land of sun and warmth in beautiful Arizona. This year has been a challenge cooking in Spiddal, Co. Galway, Ireland as we are doing renovations on our house and I have had no kitchen for the last 3 1/2 months. I am cooking on our old stove which has been set up in the garage. Not the most convenient, but a fun challenge!


THANKS FOR TUNING IN
TO ANOTHER EPISODE OF:


Saturday, July 29, 2017

BEAUTIFUL STUFFED PORK TENDERLOIN!

I love the versatility, tenderness and gentle flavor of Pork. Our Il Secondo, or main course, for this year's Easter Feast was a stuffed Pork Tenderloin. The theme for this year's dinner was: To Tuscany with Love. Although in Italy lamb is the traditional meat served at Easter Dinner, after doing a bunch of research I learned that pork is a close second favorite. I just made this recipe again while here in Ireland. The Pork here is so delicate. Pigs are raised with love; not GMO! Notice the difference in size! I will intersperse tips from both recipes.

PORK TENDERLOIN STUFFED WITH HERBS,
MARINATED PRUNES AND SERVED
WITH RED WINE REDUCTION
Dried fruits of any kind pair nicely with pork. I have never used prunes alone, but they were delicious after marinating in a lovely Italian red wine for 2 days! Their texture breaks down and you can almost spread them inside the Pork. To marinate prunes just add prunes to a glass container and cover with red wine. Cover container and leave on your counter for a couple days.
I also used this wine for the Red Wine Reduction that I served with the Pork. It was fabulous wine, which always makes for better cooking.

I decided to brine the Pork for 6 hours to ensure moist and tender meat. You can put almost any herb or spice into a brine as long as it contains salt and sugar. This is the ratio I used:

PORK BRINE:
1 1/2 cups Kosher Salt
1 cup brown sugar
2 cloves garlic
3 star anise
Black Pepper corn
It probably was not necessary to brine these succulent little Pork Tenderloins,
but I did anyway. Because they were so small I only brined for 3 hours.
Don't soak the pork overnight as it will absorb too much salt. After 6 hours thoroughly rinse and dry the pork before proceeding.

The Red Wine Reduction can be made a few days ahead, kept in the fridge and reheated before serving.

RED WINE REDUCTION:
2+ cups good red wine
1 garlic clove, minced
1 shallot, minced
2-3 Tbsp. unsalted butter
Salt/Pepper to taste

Heat the butter in a saucepan until bubbly. Add shallot, garlic and cook until just translucent. Do not brown. Add wine and turn to high heat to reduce by half. Add second tablespoon of butter. Season with salt/pepper. Add more butter to make a richer sauce. Strain pressing solids through a fine mesh strainer.

TO ASSEMBLE:
Begin by removing as much silver skin and sinew as possible. This takes a little time, but is well worth the effort as pork will be more tender.
BUTTERFLY PORK:
With your sharpest knife cut the pork along the long side being careful not to cut all the way through. Open like a book to lay flat.
MAKE HERB PESTO OR PASTE:
I used: rosemary, parsley, basil, thyme and a little sage; 4 cloves garlic, salt and pepper. Blend thoroughly in a mini-max and add enough oil to make a spreadable paste.
These are beautiful Pork Tenderloins from Mr. Feeney,
our local butcher in Spiddal, Co Galway, IRE.
Spread the paste inside the meat and then add a generous amount of marinated prunes. Just push in as many as fit.
These are the Irish Pork Tenderloins stuffed with herbs and prunes.

And here are the much larger Pork Tenderloins from Nogales, AZ.
Next, roll the pork up and tie the roast. For Easter I used Caul Fat to wrap the Pork which meant no need to tie and the fat kept the Pork incredibly juicy. Caul Fat, also known as Lace Fat is the fatty membrane encasing the internal organs of an animal. Pork is often used to wrap pates or sausages, but in this case I used beef Caul Fat.
Very happy my meat is ready to rest before getting browned and then roasted.
I left out on the counter for about 2 hours until beginning the cooking.

I couldn't get the Caul Fat here in Ireland, but these baby Tenderloins did not look
like they would need it. I just covered the Tenderloins with a little more herb paste
and drizzled with the leftover wine from the marinated prunes.
Brown the Pork on all sides in a very hot skillet with about 2 Tbsp. EVOO and 1 Tbsp. Butter. Get the pan smoking hot and then brown on all sides scraping up any bits. I did not brown the Tenderloins.

Put the Pork in a 375 degree oven for 45 minutes. Check temperature with an internal meat thermometer. For Easter I had 3 very large Tenderloins roasting so total cooking time was 1 hour 15 minutes. The time will vary depending on size of meat (3 of the Irish Tenderloins equal 1 of the large U.S. Tenderloins) and how many pieces you are cooking at once. The internal temp should be 145 degrees as the meat will keep cooking after you take it out. Dry pork is not good. The Irish Tenderloin took much less time, but keep checking temp as it should also be done (medium rare) at 145 degrees. I cooked my Tenderloins for about 25 minutes.

As with so many recipes there are endless variations.
I hope this recipe inspires you to stuff your own Pork!
 
Tune in again soon for another episode of:
 
 
Thank you for following my blog!
Sunrise from our bedroom window
overlooking Galway Bay.