Showing posts with label bacon. Show all posts

Thursday, February 21, 2019

DELICIOUS DIP AND SATISFYING SPAGHETTI!

My good friend JoJo had our tennis group over for a festive cocktail party a couple weeks ago. Everyone brought hors d'oeuvres and we had the nicest time enjoying each other's company. JoJo's friend, Dorine, was visiting from New Hampshire, which was the inspiration for the party! This is a fabulous group of women who are passionate about both tennis and food!

The Shrimp Dip is in the center.
Doreen on the left and JoJo to the right.
I brought an old-fashioned Shrimp Dip that I found in my home-made Cookbook collection of recipes clipped over the years from magazines, newspapers, and old recipe files. I don't have a clue where it came from, but it sure was yummy!
SHRIMP DIP
Ingredients:
1/4 cup packed fresh flat-leafed parsley, chopped (I used curly as that's what I have growing.)
1/2 medium onion, diced
2 scallions, both white and green parts sliced
3/4 lb. cleaned, cooked shrimp, roughly chopped
4 oz. softened cream cheese
1/4 cup mayonnaise
1/3 cup sour cream (I used Greek style yogurt.)
2 Tbsp. bottled chili sauce, such as Heinz
1 Tbsp. freshly squeezed lemon juice
1 1/2 tsp. drained bottled Horseradish
1 tsp. Worcestershire sauce
1/2 tsp. minced garlic
3/4 tsp. lemon pepper seasoning
Couple dashes Tabasco sauce
Salt/Pepper
Optional garnish: one whole shrimp and smoked paprika


Preparation:
Finely chop the onion and parsley. Thinly slice scallions. Coarsely chop the shrimp. In a medium bowl stir together cream cheese, sour cream (or yogurt), and mayo until smooth. Stir in parsley, onion, scallions, shrimp, and remaining ingredients until well combined. Season with salt and pepper. Garnish with one whole shrimp if you like and smoked paprika. Cover and let the flavors marinate in the fridge for a couple hours or overnight. Dip keeps for up to a week.


SPAGHETTI CARBONARA


Spaghetti Carbonara was my sister Cathy's "signature" dish. It was her go-to dish when she needed something fast, yet elegant.
Cathy's on the left and I'm on the right.
We used to spend hours together planning
menus and that is what we're doing here.
2004
I saw Marc Murhpy make Carbonara on 'Chopped' the other night so decided to try his version. Did you know Marc Murphy was born in Milan Italy?


I happened to have a nice piece of guanciale from my friend Jay Bileti so used that instead of the bacon. Guanciale is cured pork from the pigs jowl or cheek. It is rich with a deep porky flavor. Pancetta works well, too, and is a bit more mild. Pancetta comes from the pigs belly. Both are fatty cuts and are great in Carbonara. Because bacon is both cured and smoked it provides a completely different flavor. Bacon was Cathy's choice of meat in Carbonara and it seems it is Marc Murphy's too! I LOVED the guanciale because it is such a rare and unique flavor.
Jay displaying his guanciale.
Ingredients:
1 Tbsp. Olive Oil
1 pound slab bacon, cut into small dice (or guanciale or pancetta)
1 pound spaghetti (I like to use Bucatini as it is thicker and holds up well to the sauce.)
3 whole eggs, at room temperature
1 cup grated Parmesan cheese
1 tsp. freshly ground black pepper
Kosher salt
Guanciale rendering.


Preparation:
Bring 1 gallon of water to a boil. Add 2 Tbsp. salt. Add pasta and cook 10-12 minutes or until just al dente. Render the bacon or guanciale until crisp. Do not drain fat. Add 2 Tbsp. Olive Oil. Remove from the heat and keep warm. Combine eggs, cheese and black pepper in a large bowl. Drain the pasta and add to the egg mixture. Add a couple Tbsp. of pasta water, which thickens the sauce. Add bacon/guanciale and fat. Stir until eggs are cooked and pasta is well coated and creamy.


That's it for today!
I'm going to pop a chicken in the oven
stuffed with lots of fresh herbs, lemon
and garlic. In about 1/2 hour the
house will smell great!
Keep Loving in your Kitchen!


Friday, December 28, 2018

THE WONDERFUL WORLD OF CHARCUTERIE!


Me and Jay still smiling after 7 hours of salami making!
I recently had the privilege, once again, to work with my friend Jay Bileti making charcuterie. We cut, ground, spiced, stuffed, and hung 20 pounds of pork; two 5 lb. batches of pepperoni, and two 5 lb. batches of salami--A Tuscan salami, which has a lot of lightly crushed whole black peppercorns, fennel, anise, sugar, Kosher salt and red wine, and Calabrese, a spicy salami with cinnamon, red and black pepper, sugar, Kosher salt and red wine.

The pepperoni's contain Kosher salt, black pepper, fennel seeds, anise seeds, sugar, paprika, cayenne, chipotle and ancho pepper, and red wine.

Making salami is a precise process involving exacting science. I do not recommend making at home yourself, as if done improperly you can make yourself or someone else very, very sick or even die. Take a class or work with someone who has extensive knowledge of the science behind curing meat.


This photo is from Lexi's food blog, www.lexiscleankitchen.com.
 
First, what is Charcuterie? In Italy it generally refers to salted and dried meats, such as salamis. In France, charcuterie is generally cooked meat, such as pates. Traditionally pork is the meat that is used in both the dried and cooked processes, but as with everything there are many exceptions and variations. Pates, for example, can be made from meat, fish, poultry or livers. Today you often see both cured and cooked meats served attractively on a wooden board along with dried fruits, cheese, possibly nuts, olives, or onion jam. The word Charcuterie is also sometimes used to define the shop where these meats are sold. And, the French word for someone who makes charcuterie is a charcutier, or pork butcher. Jay is definitely a charcutier, where I am still very much a student. I would not attempt to make this on my own even after two opportunities working with Jay.
We used a combination of Pork Shoulder, Pork Belly and Pork Butt. The Butt sits higher than the shoulder and contains lots of lovely fat. When making salami you want to maintain an 80-20 ratio of lean meat to fat. The pork is cut into 1" dice removing most of the sinew and stringy bits. Next it is ground and finally spiced with cultures added.

One of the most important ingredients in charcuterie is salt. The world's oldest preservative, salt is essential to draw out moisture as the meat cures, which makes it more difficult for bacteria to grow. Since bacteria have no mouths, they need to dissolve their food in water to absorb it through their membranes--no water, no eating! And, salt also draws water out of the actual bacteria, which will kill them. Keeping all tools and work surfaces clean is also extremely important. Jay keeps a bowl of bleach water right on the counter and encourages constant washing of tools and hands. Watching the temperature of both your meat and grinding tools is also critical to discourage growth of "bad" bacteria.

 
Spices added. Next comes the Fermentation agent.


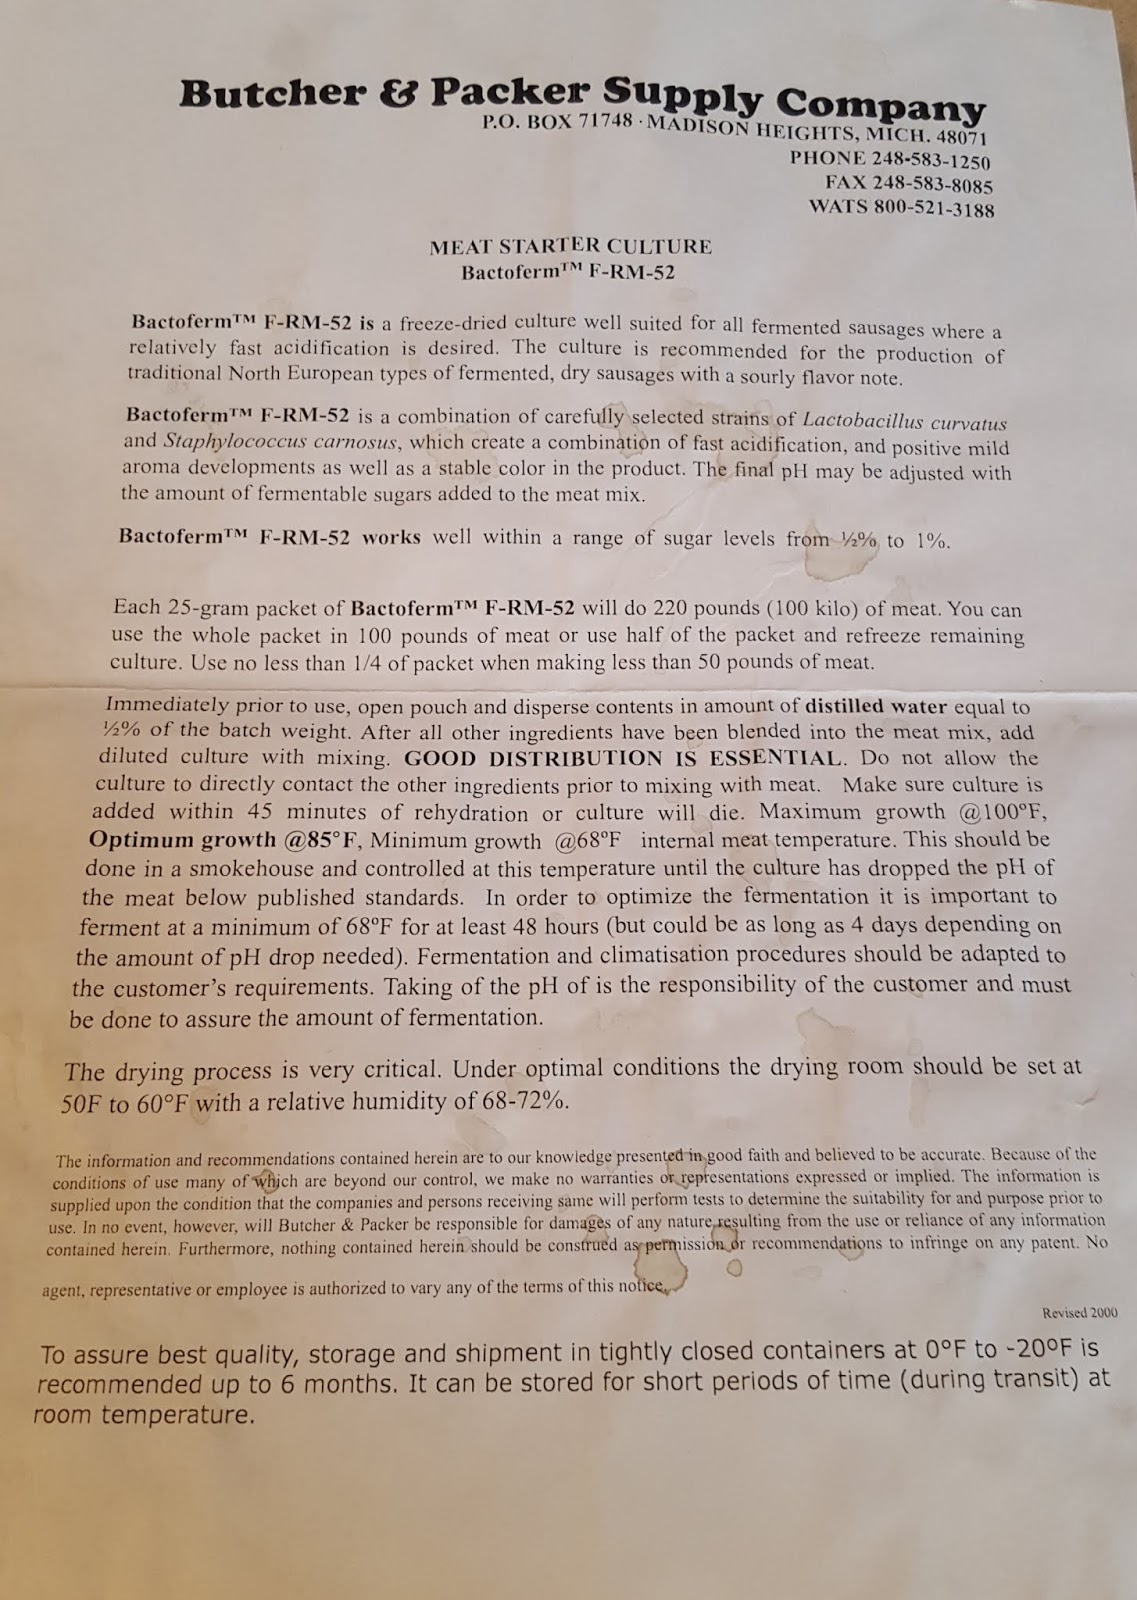
A Fermentation agent or culture mixed with a small amount of water is added to the ground meat. The Fermentation agent pre-populates the meat with beneficial bacteria so the "bad" bacteria (the ones that make you sick or can kill you) have less of a chance to grow.

Now you are ready to stuff the meat into pre-soaked casings. We used smaller intestines from a pig to make the pepperoni and larger casings from a cow for the salamis.


Once stuffed, the salamis need to be pricked so moisture can be released in the curing/drying process. The salamis also need to be brushed with a solution that helps form "good" mold. The mold helps prevent growth of "bad" mold on your salami.

Two knots are used to tie off the salami. First a square knot and then just above that knot a bubble knot (two half hitches). The second knot helps ensure that the knot doesn't slip loose resulting in your salami on the drying chamber floor. Some of our salamis weighed over 2 lbs.!
 
Within 24 to 30 hours mold starts to form.
Temperature and humidity are carefully monitored and controlled. Acidity (pH) also needs to be measured, which will tell you if the cultures are doing their thing properly. Bacteria doesn't like acidity and the fermentation process increases it, making life tough for the bacteria and creating a nice tart taste to the salamis. As I said before this is a scientific process and it was such a treat for me to work, once again, with a charcutier.

It will take the pepperoni about 4 weeks to cure and the salamis will need 6.

Jay is also curing a 20 lb. piece of Proscuitto, which takes 18 to 24 months to cure! It will lose 4 lbs. over that time, but 16 lbs. is still a lot of Proscuitto! This will be a good exercise in patience. Proscuitto comes from the back leg of a hog that is both salted and air dried.
A believer in using every part of the pig, Jay is also making Guanciale, which is cured pork jowl or cheek. The name comes from the Italian word for cheek, guancia. Can't wait to see what he does with the snout and ears!
He has already made bacon, which he generously served with wonderfully creamy scrambled eggs made by his wife, Lynn, before our day of meat cutting began.

All in all a great experience and one I hope to repeat!
 
To learn more about the art of charcuterie go to Jay's Facebook Page: Arizona Charcuterie Club.
 
Christmas is behind us and next time I will share
some of the recipes from our feast!
 
Tune in again soon for another episode of...

From my first salami adventure.
May 2017

Tuesday, May 29, 2018

DELICIOUS CARAMELIZED ONION, BACON AND SPINACH DIP!

Serve this dip at your next BBQ!
Serve with crackers, little toasts, or julienned veg.
I started with a Cooking Light recipe I found online and then changed it up by adding the spinach, reducing the amount of onions from 7 cups to 4 cups and adding some full fat.
You'll want to use a food chopper to 
reduce tears while chopping 4 cups of onion!
Ingredients:
4 cups chopped onions
4 cups chopped spinach
3 Tbsp. Olive Oil, divided 2 and 1
4 Tbsp. chopped chives
2/3 cup mayonnaise
2/3 cup Greek style plain yogurt (That is one 6 oz. container.)
6 oz. gruyere cheese, divided 4 and 2
1/4 tsp. black pepper
Salt to taste
6 slices bacon, cooked crisp and chopped

Preparation:
Preheat oven to 425 degrees. Heat a large skillet over medium-high heat. Add olive oil and drop in onions. Cook for 5 minutes stirring occasionally to lightly brown. Cover and reduce heat to low and caramelize onions for 25-30 minutes. Stir occasionally. When the onions cook down you will have about 1 1/2 cups total.
Remove the onions from the pan and add 1 more Tbsp. olive oil. Wilt the spinach in the same pan over medium-high heat; 1-2 minutes. In a large bowl mix the caramelized onion with all other ingredients.
I cook my bacon in the oven at 400 degrees
so it gets nicely crisped without getting
bacon fat all over your stove-top.
Transfer to a glass or ceramic shallow bowl coated lightly with cooking spray. Top with 2 more oz. gruyere. Bake at 425 for 20 minutes or until the dip is browned and bubbly.

And here's a refreshing summer cocktail to go with your Caramelized Onion, Spinach and Bacon Dip.
To make this Cucumber Martini:
Fill a rocks or any short glass with ice. Add Effen Cucumber Vodka. Roll a thin slice of cucumber to garnish. It's that easy!
Summer is right around the corner, which means we will
be heading to Ireland! Stay tuned for some Irish flavorites!
 

Friday, August 24, 2012

South West Chicken, and a few other tantalizing tidbits!

My husband Jerry made this recipe up a few years ago. I entered it in one of those national recipe contests, but didn't hear from them. If they actually tried this recipe I think the outcome would've been different. I do not mean to sound boastful, but this one is so easy and so delicious; extremely moist and the bacon lends a beautiful smokey flavor to the chicken thighs and avocado. Here goes...

SOUTHWEST CHICKEN
Chicken Thighs with Avocado, Pepper Jack and Bacon
 
Ingredients:
8 boneless, skinless chicken thighs
2 big cloves garlic, coarsely chopped
2 Tbsp. Olive Oil plus more for drizzling
Salt/Pepper
2 large avocados
8 oz. Pepper Jack cheese, sliced into 8 pieces
8 strips Bacon
Cilantro, chopped, optional

Preparation:
Preheat oven to 350 degrees. Cut fat and gristle off chicken thighs. If you cannot find boneless/skinless thighs, it is not that much work to bone and skin yourself; just takes a bit of time. Thigh skin and bones make wonderful chicken stock.

Rinse trimmed thighs. Pat dry. Place in a shallow baking dish with Olive Oil, generous salt/pepper, and 2 cloves coarsely chopped garlic. Let marinate at least a couple hours, but if you left all day it won't hurt them. Peel, seed and slice avocado. There are many ways to skin an avocado, but what I do is cut in half and then hit the seed or pit with the knife and pop it out. Make 4 slices in the avocado while it is still in its skin. Take a teaspoon and run between the flesh and skin and the avocado will come out whole, but pre-sliced!  After they have marinated, lay the chicken thighs flat; inside up. Divide the avocado slices between the 8 thighs. Add 1 oz. of Pepper Jack to each thigh. Because the chicken has been marinating in olive oil, they will be slippery. Roll up and wrap with one strip of bacon pulled tight to go around the thigh like a belt. Drizzle with a little more Olive Oil and bake for about 1 hour or until bacon is crisp. Baste every 20 minutes or so with pan juices.  Let sit for 15 minutes. Top with with chopped cilantro and serve.  These South West Chicken Thighs are excellent with black beans and Mexican rice.

Here is a simple idea for a quick lunch that looks attractive enough to serve to guests. You can use either real crabmeat (always better, but expensive) or the immitation crab, which is actually made from pollock. I like the immitation stuff, although I don't think it really tastes like crabmeat.
 
TOMATO STUFFED
                                     WITH CRABMEAT

This does not really need a recipe.  If you are using fake crab, just chop it into a fine dice, add a bit of finely diced celery, salt, pepper and mayo. Mix it well.  Slice a tomato into eighths being careful not to cut all the way through so the tomato keeps its shape.  Salt the inside of the tomato.  Place about 1/2 cup crab salad into the sliced tomato. You may have to push the crab salad down into the tomato. Top with freshly chopped chives and a sprig of parsley and you have a nice little lunch that takes about 10 minutes to make. If serving to guests add a chilled glass of Sauvignon Blanc and a hard roll and you have a perfectly balanced meal. In fact, even if you don't have guests that sounds pretty good!
 
Another quick and easy lunch idea...
 
LETTUCE WRAPS
This also takes only minutes to prepare, is super healthy, delicious and different. You can add any ingredient you like or may have on hand.  This is especially fast if you have leftovers, but even if you don't, it takes no time at all to prepare. This time I used salmon and sauted veg.
 
 
My husband filling his leaves!
This does not need a recipe either. Chop/dice whatever vegetable you choose. I used tomato, celery, carrot, leeks, garlic, avocado and coho salmon. Saute the celery, garlic, leek, carrot, salt/pepper in a little olive oil until tender. Toss in the chopped tomato and diced salmon. Cook for 2-3 minutes until the salmon turns opaque. Take off heat and add chopped avocado. You can use any type of lettuce, but iceburg makes a nice wide surface. Lay out a few leaves of lettuce on each serving plate. Place the cooked veg and salmon in a serving bowl and let each guest fill and roll their own leaves. Most people like to be involved with their food and this easy luncheon dish gives them the whole experience.


Lettuce wraps can be messy, but they are worth it!
Doesn't he look a bit like a Rabbitt?? Chicken or shrimp and sauted vegetable also work well in a lettuce wrap. Or you can do an all vegie wrap with lots of fresh herbs. The choices are endless...

TIP:  This relates to nothing, but I just tried it recently and it is really yummy. We like to make popcorn at night as a snack. Next time you're popping, add a couple Tbsp. of truffle oil to the oil you are popping in. It makes the popcorn taste like it is dredged in butter. I like to use a combination of olive oil and grapeseed oil. The grapeseed oil has a higher smoke point (the point at which the oil begins to break down and starts to smoke just before burning) so pops the corn quickly making it very light. I know there are those who say you should never cook with grapeseed oil because it is mainly a polyunsaturated oil which releases lots of free radicals, when heated, but I choose to cook with it anyway because I love the taste. The addition of truffle oil elevates popcorn to a very decadent treat.

On to another different entre idea...
 
SPAGHETTI SQUASH
This is the strangest squash and really does turn into spaghetti once it is cooked. Use it as you would spaghetti and top with red sauce and meatballs or olive oil and veg which is what I made for dinner the other night.
This squash is very hard, similar to a Blue Hubbard so be careful when you are slicing.
Scoop out the seeds and other fibrous stuff inside. I cooked the squash as two separate halves which took a lot of time, but I wasn's sure if I cut it up if I would still get the long spaghetti strings. Next time I would cut it at least in long quarters. Boil in salted water until tender.
Using a fork, scrape out the squash by running the fork through the flesh of the squash. Plate it up just as you would spaghetti and add your topping. I used a very simple sauted mushroom, lots of garlic, chopped tomato and a splash of white wine. Garnish with basil. Again, the combinations for spaghetti squash are limited only by our imaginations. If you close your eyes while eating this, you really do think you are eating spaghetti!

THE QUESTION OF FAT:  This also has nothing to do with anything, but as you may know I am a big fan of Dr. Andrew Weil and read his health and cooking tips daily. This week he came out with a story on LARD. Yes, the solid, white pig fat that for years has been considered horrible for you. I happen to like fat of all kinds, pig included (pork rinds anyone?) and although I do not bake with lard it does add a flavor and flakiness to pastry that is unmatched. Dr. Weil claims the latest studies show that lard and other saturated fats formerly believed to cause coronary heart disease, high cholesterol, heart attacks, etc. are not really bad for you after all. Of course, he recommends you use lard from organic, grass-fed pigs. BRING ON THE LARD! 

What next?!? I am of the belief that "they" do not really know what is good or bad for us and you should pretty much eat, drink, DO whatever you like as long as it makes you happy and doesn't hurt anyone else. If eating something makes you feel good, it is probably good for you.


THERE IS ALWAYS ROOM FOR...

JELLO
 

I have started experimenting with unflavored Knox gelatin by making home-made jello. It is so much better than the stuff we ate as kids that is filled with artificial colors and flavors, and it is very easy to make. Mix 1 packet unflavored gelain and 4-6 packets of Stevia or sugar. Heat 2 cups of fruit juice. Add to the gelatin/sugar and stir until dissolved. You can either pour the gelatin in individual serving bowls or use 1 large mold. The first time I used V-8 Light  Fruit Fusion--Blueberry Pomegranate. It was fabulous. Next I tried Light Tropical Punch Fuze. I did not realize until after I made the jello that this particular Fuze has pineapple juice in it which impedes the thickening of the jello. If you used all pineapple juise it would not jell at all. I topped the tropical punch jello with alcohol infused whipped cream making it a little more grown-up. This whipped cream comes in different flavors. The vanilla worked well in this case. 
 
I think unexpected flavors like grapefruit or pear nectar will be fun to try. 
 
Remember tomato aspic? That will be the next one I try.


I have had a ball this afternoon thinking about food and hope you enjoyed reading as much as I did writing!  Now, let's get cooking!  Until next time...

Be bold in the kitchen. Try new flavors.
Get your creative juices flowing. Have fun!
There are no mistakes when it comes to cooking!
 
Tune in again soon for another episode of: